.NET原生支持MVVM模式,但在定义可通知属性和命令时,需要写较多代码(相比三方库而言)。
CommunityToolkit.MVVM库基于源代码生成器技术,通过为普通字段和方法添加注解,就能后台生成对应的可通知属性和命令,这一点做得相当漂亮,正因如此,该库成为轻量级MVVM框架的典范。
Prism库是一个重量级的MVVM框架,它的重点是提供了一整套系统解耦的方案,主要包括依赖注入容器、对话框服务、模型视图定位器、模块化机制、事件聚合器、页面导航,由于关注点不一样,该框架在可通知属性和命令定义方面较弱。
将两者结合起来使用,明确并严格遵守两者的职责界线,能最大程度提升WPF大型应用的开发效率和项目可维护性。
Prism项目创建
项目结构
对于简单项目,可以将WPF相关代码放到一个项目中,并划分为Views、ViewModels、Services等模块,如下图所示:

引入Prism
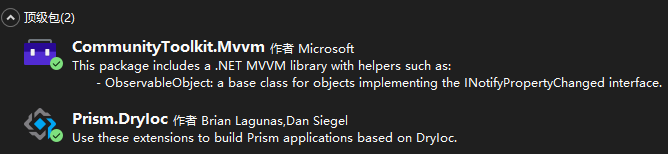
安装依赖
Prism支持DryIoc和Unity两种容器,前者性能较好,后者与微软的生态结合更加紧密,选择安装其一即可。
本文结合使用CommunityToolkit.MVVM框架,用来定义可通知属性和命令。
改造App
1
2
3
4
5
6
7
| <prism:PrismApplication x:Class="PrismProject01.App"
xmlns="http://schemas.microsoft.com/winfx/2006/xaml/presentation"
xmlns:x="http://schemas.microsoft.com/winfx/2006/xaml"
xmlns:local="clr-namespace:PrismProject01"
xmlns:prism="http://prismlibrary.com/">
<prism:PrismApplication.Resources/>
</prism:PrismApplication>
|
1
2
3
4
5
6
7
8
9
10
| public partial class App : PrismApplication {
protected override Window CreateShell() {
return Container.Resolve<MainWindow>();
}
protected override void RegisterTypes(IContainerRegistry containerRegistry) {
containerRegistry.Register<Services.ICustomerStore, Services.DbCustomerStore>();
containerRegistry.RegisterDialog<WarningDialog,WarningDialogViewModel>();
}
}
|
- App需要继承自
PrismApplication,并实现CreateShell()和RegisterTypes()两个抽象方法,前者用于指定主窗体。
RegisterTypes()用于在容器中注册类型,包括各种服务、对话框等,这是Prism框架的一大核心!
可通知属性和命令
以下代码使用CommunityToolkit.MVVM的方法高效定义可通知属性和命令:
1
2
3
4
5
6
7
8
9
10
11
12
13
14
15
16
17
18
19
20
21
22
23
24
25
26
27
28
29
30
31
32
33
34
35
36
37
38
39
40
41
| #region 可通知属性定义
public ObservableCollection<string> Customers { get; private set; } = new();
private string? _selectedCustomer = null;
public string? SelectedCustomer {
get => _selectedCustomer;
set {
if (SetProperty(ref _selectedCustomer, value)) {
MessageBox.Show(SelectedCustomer ?? "SelectedCustomer为空");
}
}
}
[ObservableProperty]
[RegularExpression(@"^\d+$", ErrorMessage = "年龄必须为非负整数")]
[Required(ErrorMessage = "年龄不能为空")]
[NotifyDataErrorInfo]
[GenerateIntValue]
private string _age = "32";
#endregion
#region 命令逻辑定义
[RelayCommand]
private void LoadData() {
Customers.Clear();
Customers.AddRange(_customerStore.GetAll());
}
[RelayCommand]
private void ValidateData() {
ValidateProperty(Age, nameof(Age));
if (HasErrors) {
var errors = string.Join(Environment.NewLine, GetErrors().Select(e => e.ErrorMessage).ToList().Distinct());
MessageBox.Show(errors);
ClearErrors();
return;
}
MessageBox.Show($"Age={AgeValue ?? 0}");
}
#endregion
|
- 利用该框架可以轻松实现数据校验,如果是整数、浮点数等类型,建议前台使用string类型,因为该类型能支持最丰富的校验并给用户提示,但是需要用户手动进行数据转换。
- 为了避免用户手动进行数据转换,可以使用源代码生成器为该string类型数据生成目标类型转换器,为string字段标注
[GenerateIntValue]或[GebnerateDoubleValue]后,就能在后台生成转换器。
- 数据校验可以分为以下两个步骤:① 根据注解校验单个数据;②校验多个数据之间的关系。
- 无论是使用Prism还是CommunityToolkit.MVVM,只是对原生定义方法的抽象封装,在View中的使用方式是一样的。
ViewModel定位器
在Prism中,我们通常不需要手动为View指定ViewModel(即为DataContext属性赋值),需要注意以下几点规则:
- 通过
RegisterDialog注册的对话框会自动处理ViewModel绑定,不需要在View中显式声明AutoWireViewModel=True。
- 如果没有用以上的方法进行对话框注册,那么显式声明
AutoWireViewModel=True后,系统将自动寻找ViewModel进行绑定,实际开发过程中建议将对应的ViewModel放置在以下命名空间:
- 查找View命名空间下的ViewModel。
- 查找与View命名空间同级的ViewModels命名空间。
窗体服务
窗体服务是Prism框架的一大特色功能,能解决传统WPF MVVM应用中窗体创建和数据传递的痛点问题,使用步骤如下。
定义View
创建用户控件即可,弹出窗体时系统会自动将该用户控件放到窗体中(该窗体被称为对话框窗体,可以自定义):
1
2
3
4
5
6
7
8
9
10
11
12
13
14
15
16
| <UserControl x:Class="PrismProject01.Views.WarningDialog"
xmlns="http://schemas.microsoft.com/winfx/2006/xaml/presentation"
xmlns:x="http://schemas.microsoft.com/winfx/2006/xaml"
xmlns:mc="http://schemas.openxmlformats.org/markup-compatibility/2006"
xmlns:d="http://schemas.microsoft.com/expression/blend/2008"
xmlns:local="clr-namespace:PrismProject01.Views"
mc:Ignorable="d" MinHeight="350" MinWidth="550">
<Grid>
<StackPanel>
<TextBox Text="{Binding Dollar}"/>
<TextBox Text="{Binding RMB,Mode=OneWay}"/>
<Button Content="确认" Command="{Binding ConfirmCommand}" />
<Button Content="取消" Command="{Binding CancelCommand}" />
</StackPanel>
</Grid>
</UserControl>
|
定义ViewModel
定义弹出对话框的视图模型时,除了定义传统的可通知属性和命令外,还需要实现IDialogAware接口
1
2
3
4
5
6
7
8
9
10
11
12
13
14
15
16
17
18
19
20
21
22
23
24
25
26
27
28
29
30
31
32
| public partial class WarningDialogViewModel : ObservableValidator, IDialogAware {
#region 实现IDialogAware
public DialogCloseListener RequestClose { get; set; }
public bool CanCloseDialog() => true;
public void OnDialogClosed() { }
public void OnDialogOpened(IDialogParameters parameters) {
if (parameters.ContainsKey("title"))
Title = parameters.GetValue<string>("title");
if (parameters.ContainsKey("dollar"))
Dollar = parameters.GetValue<int>("dollar");
}
public string Title { get; set; } = "温馨提示";
#endregion
[ObservableProperty]
[NotifyPropertyChangedFor(nameof(RMB))]
private int _dollar;
public int RMB => 8 * Dollar;
[RelayCommand]
private void Confirm() {
DialogParameters parameters = new DialogParameters();
parameters.Add("rmb", RMB);
RequestClose.Invoke(parameters, ButtonResult.OK);
}
[RelayCommand]
private void Cancel() {
RequestClose.Invoke(ButtonResult.Cancel);
}
}
|
RequestClose是窗体的关闭逻辑,通过他的Invoke()方法可以关闭窗体,并向调用窗体返回参数和关闭标识符。CanCloseDialog用来控制窗体是否可以被关闭,根据业务场景来使用。OnDialogOpened()会在窗体打开后执行,主要用来获取主窗体传递过来的参数(打开窗体时传递),进而为ViewModel的属性或字段赋值。OnDialogClosed()会在窗体关闭后执行,用于善后工作,注意RequestClose.Invoke()执行后都会走到这个函数。
注册对话框
这是框架的常规动作,注册后就可以通过窗体服务弹出对话框:
1
2
3
4
5
| protected override void RegisterTypes(IContainerRegistry containerRegistry) {
containerRegistry.RegisterDialog<WarningDialog,WarningDialogViewModel>();
}
|
- 注册时可以为该对话框指定名称,也可以不指定,这会影响到后面的调用逻辑。
弹出对话框
1
2
3
4
5
6
7
8
9
10
11
12
13
14
15
| public partial class MainWindowViewModel(ICustomerStore _customerStore, IDialogService _dialogService) : ObservableValidator {
[RelayCommand]
private void ShowDialog() {
DialogParameters parameters = new();
parameters.Add("title", "弹窗测试");
parameters.Add("dollar", 100);
_dialogService.ShowDialog(nameof(WarningDialog), parameters, callback => {
if (callback.Result == ButtonResult.OK) {
MessageBox.Show($"$100={callback.Parameters.GetValue<int>("rmb")}RMB");
}
});
}
}
|
- 弹出对话框需要依赖对话框服务,通过构造函数依赖注入即可。
- 通过
_dialogService.ShowDialog()即可弹出对话框。
- 第1个参数是对话框名称,如果注册时指明了名称,直接使用指定的名称即可;第2个参数是传递给弹出对话框的参数字典;第3个参数定义了窗体关闭后的执行函数,可以根据对话框退出状态码来执行相应的业务逻辑。
自定义DialogWindow
创建一个WPF窗体,设置窗体相关行为,以下两点值得关注:
Title="{Binding Title}"这行代码至关重要,有了这行代码可以让对话框窗体的标题自动从对话框的Title属性获取,当不自定义对话框窗体时这是默认行为。<ContentControl prism:RegionManager.RegionName="DialogContent" />这行代码制定了对话框用户控件加载的位置。
1
2
3
4
5
6
7
8
9
10
11
12
| <Window x:Class="PrismProject01.Views.CustomDialogWindow"
xmlns="http://schemas.microsoft.com/winfx/2006/xaml/presentation"
xmlns:x="http://schemas.microsoft.com/winfx/2006/xaml"
xmlns:prism="http://prismlibrary.com/"
WindowStartupLocation="CenterOwner"
ResizeMode="NoResize"
Title="{Binding Title}"
SizeToContent="WidthAndHeight" >
<Grid>
<ContentControl prism:RegionManager.RegionName="DialogContent" />
</Grid>
</Window>
|
1
2
3
4
5
6
7
8
9
10
| using System.Windows;
namespace PrismProject01.Views {
public partial class CustomDialogWindow : Window, IDialogWindow {
public CustomDialogWindow() {
InitializeComponent();
}
public IDialogResult Result { get; set; }
}
}
|
接下来需要在容器中注册该对话框窗体:
1
2
3
4
| protected override void RegisterTypes(IContainerRegistry containerRegistry) {
containerRegistry.RegisterDialogWindow<CustomDialogWindow>();
}
|
模块化机制
对于大型WPF应用,可以按照业务功能对系统进行模块划分,每个模块放置到各自的类库项目中,常见的项目组织如下:

可以为Visual Studio安装Prism项目模板,通过模板就能创建Prism模块化应用。
在CAD二次开发中使用Prism
启动器定义
与独立桌面应用有所区别,在插件中不需要默认启动窗体,需要定义一个继承自PrismBootstrapper的启动类,同样可以注册类型。
1
2
3
4
5
6
7
8
9
10
| public class ThisPrismBootstrapper : PrismBootstrapper {
protected override System.Windows.DependencyObject CreateShell() {
return null;
}
protected override void RegisterTypes(IContainerRegistry containerRegistry) {
containerRegistry.RegisterDialog<Views.Test1View, ViewModels.Test1ViewModel>();
containerRegistry.Register<Services.ICustomerStore, Services.DbCustomerStore>();
}
}
|
在CAD插件初始化函数中启动该启动器即可。
1
2
3
4
5
| public void Initialize() {
var bootstrapper = new ThisPrismBootstrapper();
bootstrapper.Run();
}
|
初始对话框定义
第一个对话框只能用传统的方式弹出,点击该对话框上的按钮再次弹出对话框时,就可以借助Prism的对话框服务。这里可以通过prism:ViewModelLocator.AutoWireViewModel="True"为初始对话框指定ViewModel。
1
2
3
4
5
6
7
8
9
10
11
12
13
| <Window x:Class="PrismInCAD01.Views.MainView"
xmlns="http://schemas.microsoft.com/winfx/2006/xaml/presentation"
xmlns:x="http://schemas.microsoft.com/winfx/2006/xaml"
xmlns:d="http://schemas.microsoft.com/expression/blend/2008"
xmlns:mc="http://schemas.openxmlformats.org/markup-compatibility/2006"
xmlns:prism="http://prismlibrary.com/"
prism:ViewModelLocator.AutoWireViewModel="True"
Title="MainView" Height="450" Width="800">
<StackPanel Orientation="Vertical">
<Button Content="弹出新窗体" Command="{Binding ShowTest1ViewCommand}"/>
<Button Content="统计图形个数" Command="{Binding CountEntityCommand}"/>
</StackPanel>
</Window>
|
弹出初始对话框用传统方法即可:
1
2
3
4
| [CommandMethod("cmdtest1")]
public void Test1() {
Application.ShowModalWindow(new MainView());
}
|
按钮激发下一个对话框时,可以在ViewModel中使用对话框服务:
1
2
3
4
5
6
7
8
9
10
11
12
13
14
15
16
17
18
19
20
21
22
23
24
25
| public partial class MainViewModel : ObservableObject {
private readonly IDialogService _dialogService;
public MainViewModel(IDialogService dialogService) {
_dialogService = dialogService;
}
[RelayCommand]
private void ShowTest1View() {
IDialogParameters parameters = new DialogParameters() {
{"title","李浩测试Prism" },
{"name","李浩Lihao" }
};
_dialogService.ShowDialog(nameof(Test1View), parameters);
}
[RelayCommand]
private void CountEntity() {
var doc=Application.DocumentManager.MdiActiveDocument;
if(doc==null) return;
MessageBox.Show(doc.Name);
}
}
|
注意事项
- 最好将生成的dll打包到单独的dll,可以避免dll版本带来的问题,安装
Costura.Fody包即可实现。
- 与AutoCAD相关的dll可以不打包,在项目配置文件中进行以下设置即可:
1
| <PackageReference Include="AutoCAD.NET" Version="24.0.0" ExcludeAssets="runtime" />
|
结语
页面导航、事件聚合器等机制暂不讨论,后者与CommunityToolkit.MVVM的事件聚合器相当,遵循定义事件、定义事件处理器、发布事件等常规流程。
后期根据项目实际经验再深化更新。